Liberating a chinese robot, to then control it with a chinese LLM
DIY AI Explorer robot - Reverse engineering and build writeup.
- date
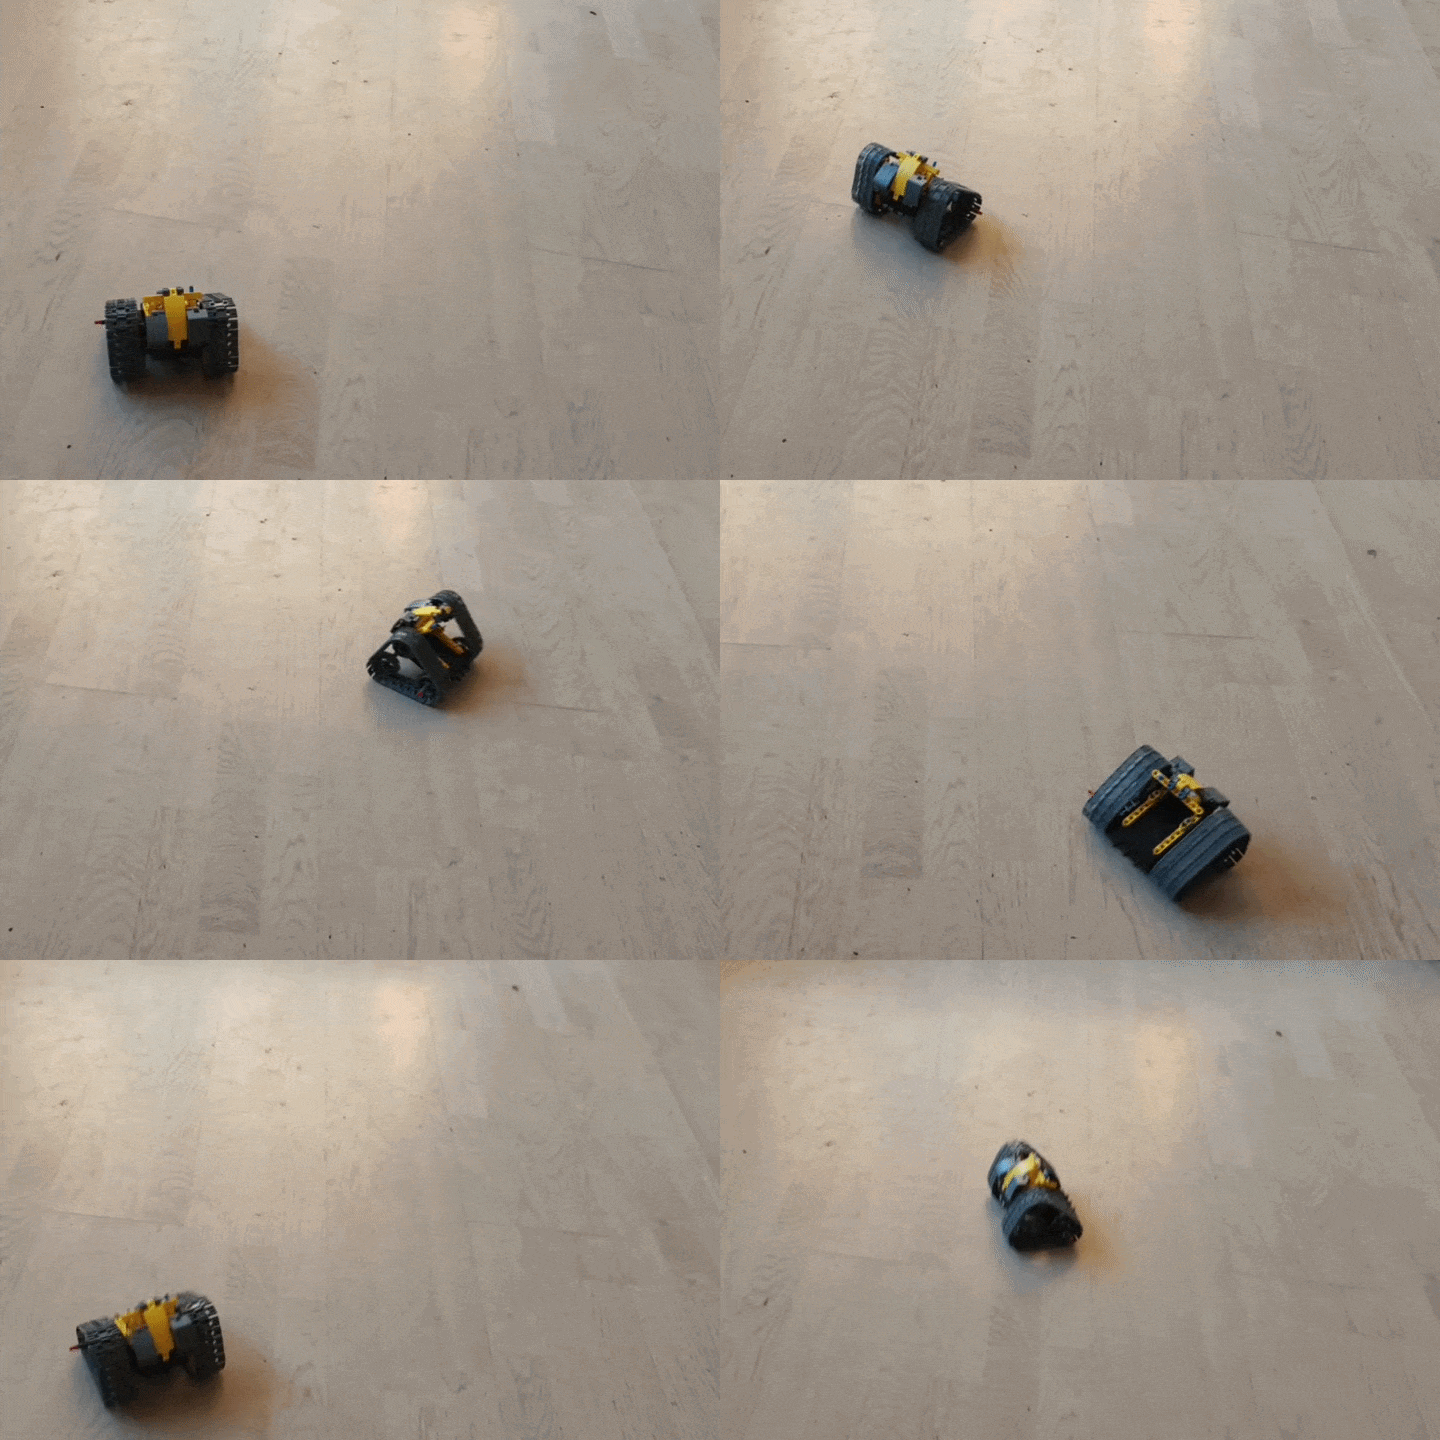
(quick assembly)
I recently graduated so I lost access to the 3d Printers and all of the tools I had at university so I had to improvise. Thankfully I had one of these iM.Master robots laying around that I got as a gift a while ago. I played with it a bit and thought if its using 2.6 to connect to the controller, and bluetooth (alongisde location and some other permissions) to connect to the app on my phone, then probably I could intercept this signal and control it from my laptop? No exposed API, no documentation of how the app talks to it. You press a button in the app, the robot moves. That’s the entire interface. So the very first question was: what does the app actually sendover the air?
A quick hint came from how the phone and robot behave. The robot never appears in the classic Bluetooth pairing list, but the app and robot talk without pairing. That suggested low-energy broadcasts like the ones used by car keys or BLE beacons. These let a phone keep broadcasting small packets without pairing, which also explains why the app asks for location on Android.
Build ingredients:
- a not hacked iM.Masters robot (to hack on your own)
- RPI (rpi5 used here overkill but only one i had available)
- AI Hat Tops 2
- A camera + microphone and speaker (Used an old iphone)
- Lots of cable and duct tape.
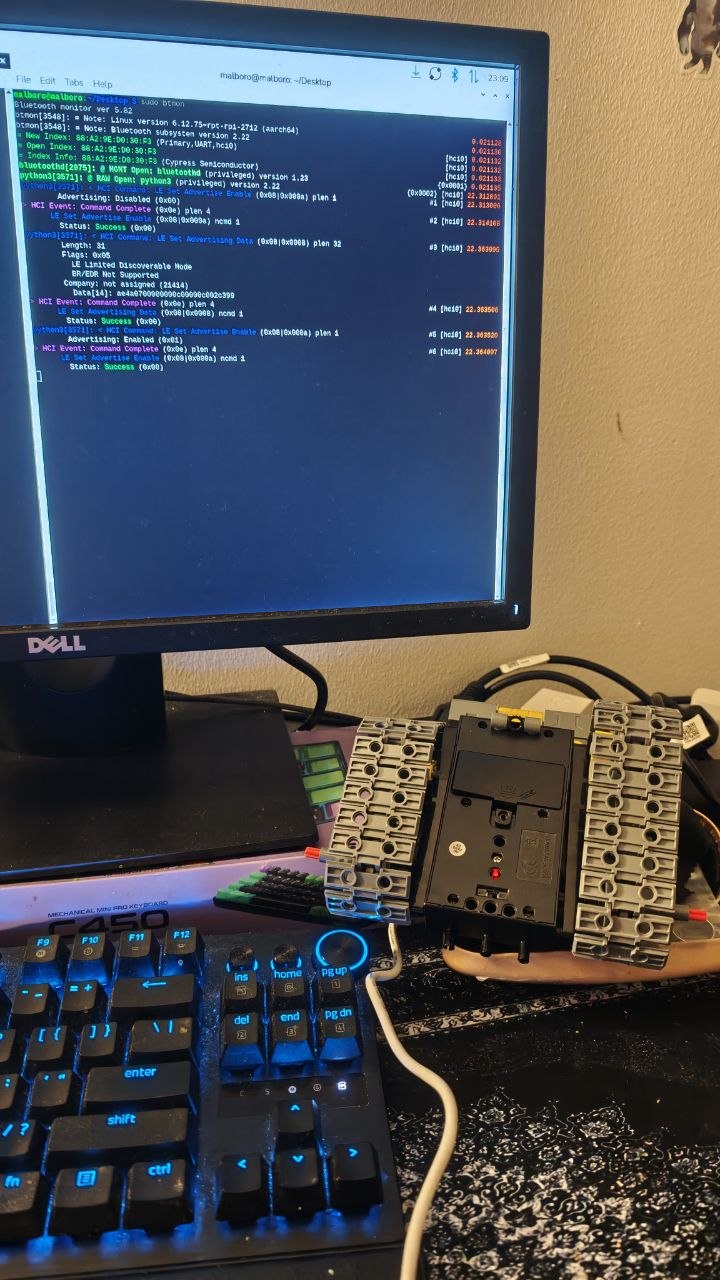
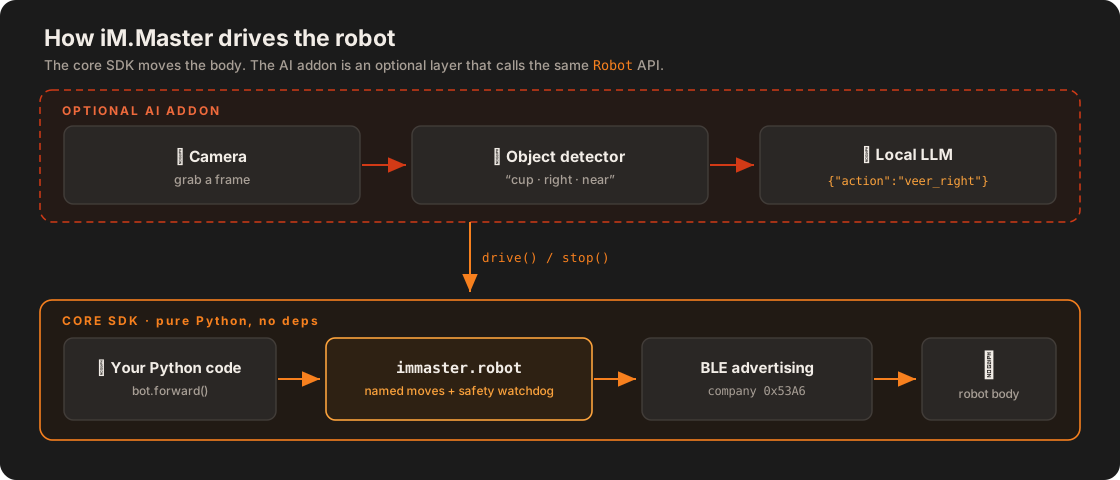
But to get to this we have to start our journey at the beggining:
import asyncio
from bleak import BleakScanner

async def main():
    devices = await BleakScanner.discover()
    for d in devices:
        print(f"Device: {d.name}, Address: {d.address}")

asyncio.run(main())
This simple scan checks whether the robot appears at all. It did not. A deeper scan with a callback that prints advertisement fields exposed the important piece: manufacturer-specific data. That led to the company ID we later matched to 0x53A6.
I tried the usual approach: connect with BleakClient, enumerate services, and look for writable characteristics. That did not work. There were no useful writable channels and no GATT writes in the captures.
To see what the official app actually does, I used Android’s Bluetooth HCI snoop log:
- Enable Bluetooth HCI snoop log in Developer Options.
- Drive the robot with the app and record a session: idle, forward, reverse, left, right, stop.
- Pull the
btsnoop_hci.logfrom the phone usingadbor a bug report. - Open it in Wireshark.
The capture showed no GATT connections. Instead, the phone repeatedly set its advertising packet and re-enabled advertising roughly every 40 ms. Each advertisement carried a Manufacturer Specific Data field (type 0xFF) with company ID 0x53A6 followed by a 14-byte payload.
Windows and Bleak can scan these advertisements, but they cannot craft arbitrary advertisement payloads. For that I used a Raspberry Pi and raw HCI sockets (AF_BLUETOOTH, SOCK_RAW, BTPROTO_HCI). From the Pi I pushed LE Set Advertising Data and LE Set Advertise Enable packets at the same rate the phone used.
When the Pi started sending matching frames, the robot’s LED went solid and it accepted the controller. Replaying a few captured payloads made the wheels move.
At that point three facts were clear:
- BLE advertising is the transport.
- The manufacturer format and company ID match the capture.
- The robot interprets manufacturer data as commands.
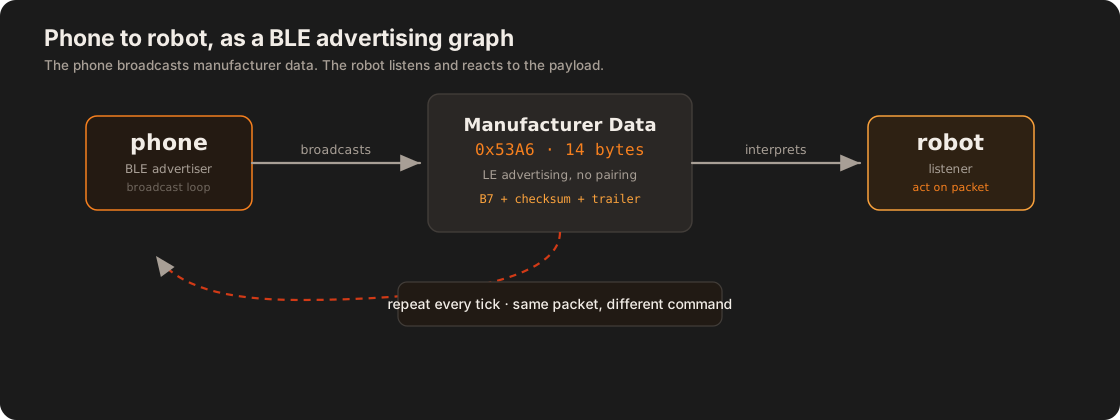
Only decoding the payload remained.
Early replays sometimes moved only one wheel. That turned out to be checksum errors in the replays. Once frames had correct checksums, control was reliable.
What I found:
The frame set contains only nine distinct command frames. These match all combinations of two ternary wheel states.
Each wheel has three states:
stop,forward, andreverse. There is no proportional speed.One byte (B7) encodes both wheel states: B7 =
0xC0 | (left << 2) | right.Byte 11 is a checksum equal to the population count of B7:
CK = popcount(B7).The 31-byte advertising buffer looks like this: flags
02 01 05, manufacturer headerlen 0xFF a6 53, 14-byte payload, zero-padded to 31.Manufacturer payload example (14 bytes) is shown below.
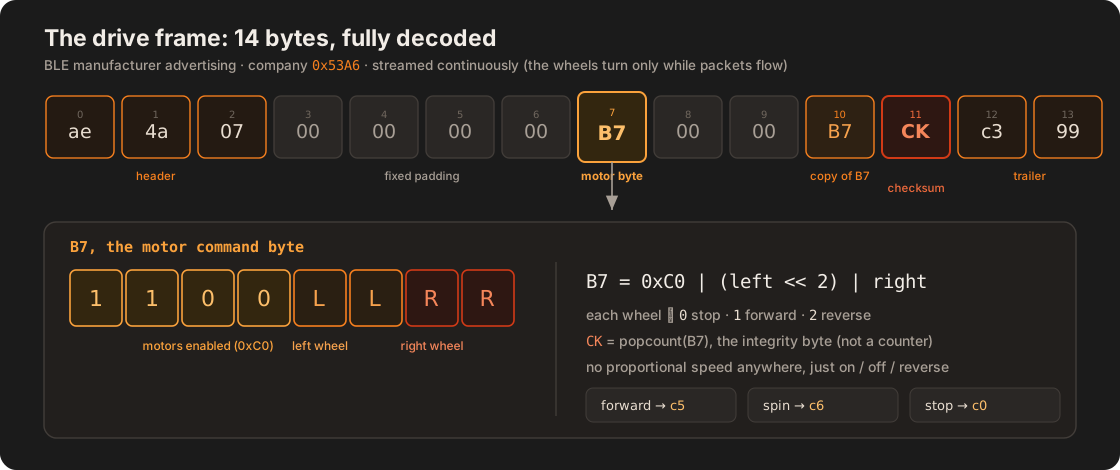
Idle beacon differs slightly:
ae 00 00 00 00 00 00 00 00 00 00 00 e1 99The wheel byte layout:
bit:  7 6 5 4 3 2 1 0
      1 1 0 0 L L R R
The able of frames and meanings can be found in the detailed protocol writeup on my github. Cause all of this I open-sourced as an SDK so that anyone can “liberate” their iM.Master robots.
The decoder and builder are in immaster/protocol.py and the broadcaster in immaster/driver.py.
  from immaster.protocol import build_frame, decode_frame, Wheel

  build_frame(Wheel.FWD, Wheel.FWD).hex()   # -> 'ae4a0700000000c50000c504c399'
  decode_frame(bytes.fromhex('ae4a0700000000c90000c904c399'))  # -> (REV, FWD)
The protocol is considered fully reverse-engineered.
However it doesn’t end here.
The next step is to now make a qwen model actually control the robot. Im using an old phone for the camera and microphone. Using a simple browser to connect to the server running on the RPI which contains a qwen LLM and a hailo vision model. The vision model fetches frames from the IP camera which is running on the phone, and the LLM gets prompts from the phone aswell through the web-app (served on the RPI, opened on the browser on the phone). This makes for a very DIY-ed hacky-scrappy pipeline but it works!
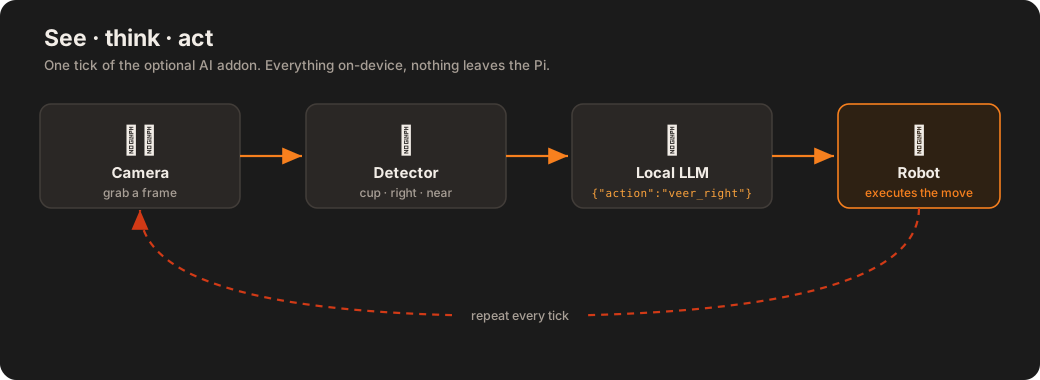
After wiring all of that together and testing witha few different personas and moodels I settled down on the qweun2.5-instruct model for the LLM and one of the pre-trained hailo models that could easily run on the AI-hat I got for the RPI. Now adding a little “cheer” animation aaaaand we can tell the robot to find something in the room.
(testing robot with prompt ”look around untill you find a backpack“)
Boom the little guy finds it and does a little celebration. It can now explore all on its own!
also see